Have you left your bong behind at a friend's house? Maybe you never purchased one in the first place, you don’t have other alternatives, or perhaps you're just willing to try something new. Whatever the case may be, don't think too hard as we have the solution for your inconvenience. Today's DIY instructions will guide you through the process of making a homemade bong.
In reality, learning how to make a water bottle bong is an experience that any real stoner should have at least once in a lifetime, at the very least to mark it from your list. Nonetheless, we strongly advise you to make an investment and simply order a high-functioning model anyways. Don’t get too comfortable.
Therefore, before we show you how to make a bong out of standard household products, you should know that this is not the healthiest way to consume cannabis. You will need plastic to build this bong and possibly a few of its individual components. Smoking out of plastic is never a good idea because the heat from the smoke and the lighter’s heat will allow some of the plastic's substances to leach into your bloodstream.
How to Make a Bottle Bong
Materials
- A pen entirely made of metal or at least with a metal tip
- Gum or clay
- A long, empty water bottle
- Ground cannabis of your preference
- A lighter
To learn how to make a homemade bong successfully, you need to understand the structure and the basics of these simple devices.
- The small hole on the bong’s side or back, known as the carb or carburetor, allows you to adjust the airflow with your index finger.
- The tube is the part of the bong where the smoke rises all the way to get into the lungs.
- The downstem is the narrower pipe that links the bowl to the water, allowing the smoke to pass down to the base and back up through the tube.
- The base is where the water sits and cools the smoke.
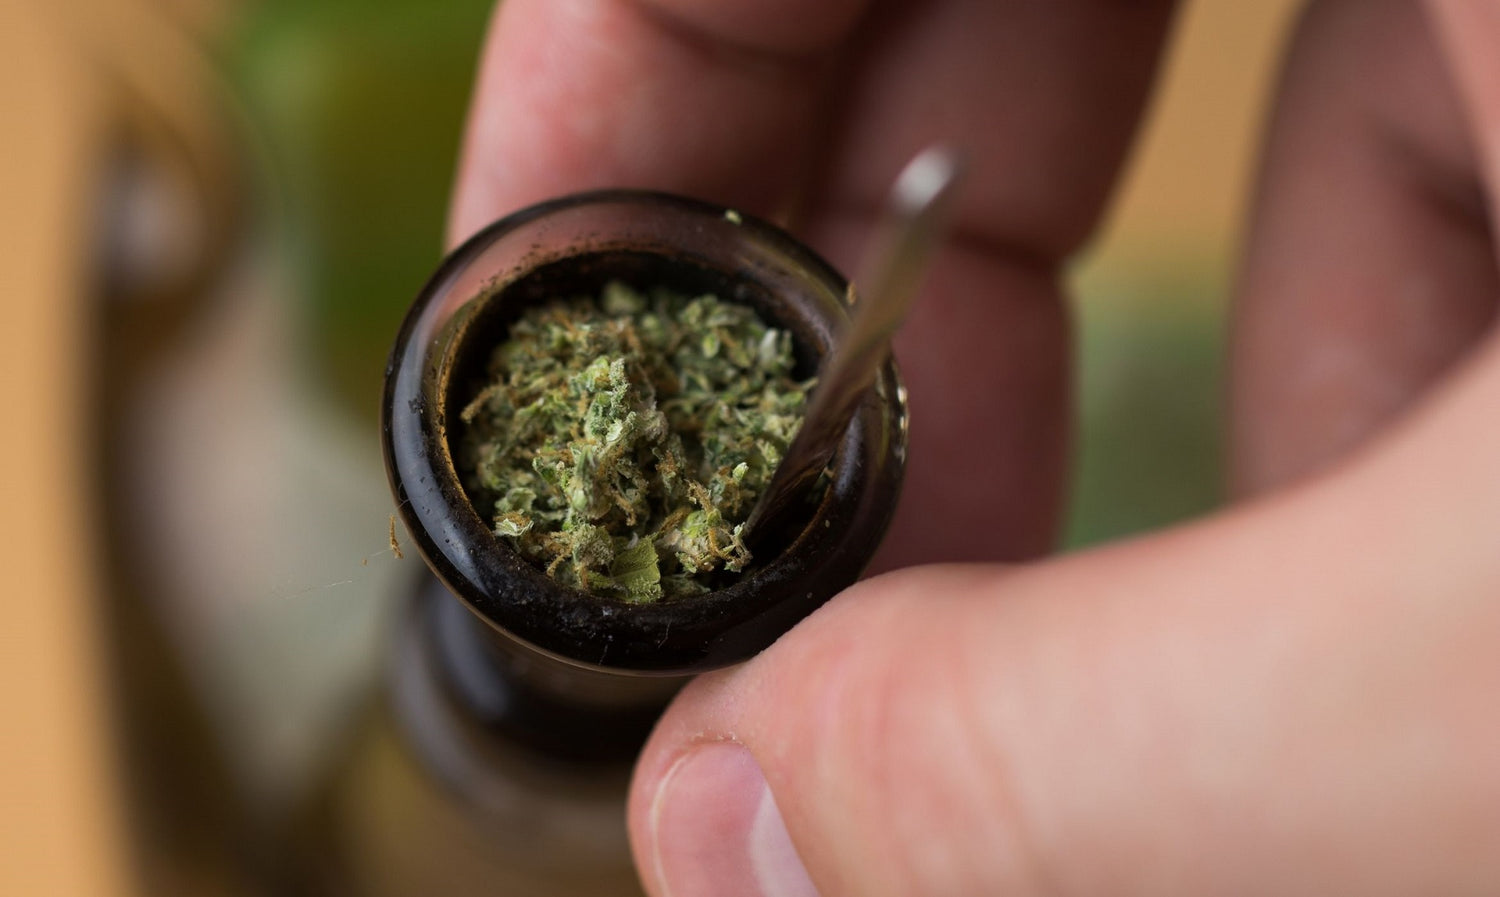
- The bowl is the container where your marijuana is packed.
Directions
Step 1
Create the downstem of your bong before you do something else with your water bottle. You'll simply create a pen-pipe to complete this task. Preferably, the pen you use should be made entirely of metal. If that's not the case, please ensure it has a metal lid that can be unscrewed, that part that looks like a long bullet.
Step 2
Unscrew the shaft and pop off the bottom bit with a butter knife. Remove the ink tube and any other small parts (such as the spring) until you're left with only the pen's shaft and metal screw-on top. Flip the metal shaft on top upside-down and firmly push the pointed end into the pen's shaft. Toss away the remaining parts of the pen.
Step 3
Remove the cap and empty your water bottle. The next move is to make a small hole in the bottom third of the water bottle with a lighter, meaning two or three fingers up the end of it. Keep in mind you need to have the empty pen-pipe you just made on hand to do this properly. Then, keep the flame of your lighter against the bottom third of the water bottle for a few seconds.
Step 4
When a small hole appears in the bottle due to the heat, quickly push the pen dowsteam through the hole. Since the plastic is now hot when you do this, it can mold fairly tightly around the pen shaft. If the gap was too small to fit the pen shaft through, quickly press the lighter against the plastic and try again. This part of the pen should point downwards toward the water bottle's bottom, like tilting it down.
Step 5
Regardless of how good you are at lighting a bowl of water bottles, there's a strong possibility your shaft isn't entirely placed to the structure. As a consequence, you'll need to install a seal around its edge. Chewing up a piece of gum and wrapping it around the pen shaft right where it attaches to the water bottle to create a seal is an excellent easy way to solve this issue. Much better if you find a piece of clay to secure it.
Step 6
Load your water bottle to the point you notice a part of the pen shaft is submerged. Fill the water bottle only to the level where the water meets the part of the bottle where the pen pierces. Otherwise, the gum or clay will get soaked and fall off, maybe a finger away from reaching this wrapper.
Step 7
For the carb, just poke a hole in the opposite extreme where the pen shaft is with a knife or cutter, big enough to be effective, but bear in mind your finger has to cover it too comfortably.
By now, you should have a bong made out of a water bottle! To use, simply put your ground-up flower in the metal pen tip and light it while inhaling through the water bottle's top. If you’ve done it nicely, the water should bubble up, and no smoke should leak near the improvised downstem. Moreover, avoid using foil. As this is already a risk due to the plastic burning, it would be more dangerous for your lungs and health in case you want to add this material to your bong.
Instead, why don’t you choose a healthier option and give a daily life object a second purpose? For instance, a pipe with a tasty apple. This water bottle pipe is one fun way of recycling and reusing that only requires patience and basic skills. However, it should stay as a one time occasion for your well-being.
1 comment
Good read. I found both of these very informative, this and Olivastu’s recent piece, How to Make a Bong at Home: A Step by Step Guide. Keep up.